|
Friends, as you may be able to guess from the title this is about backups. The other day sadly, my desktop, started emitting clouds of black smoke out of the back, and stopped working. When it had cooled down, and the smoke had stopped coming out I was able to have a closer examination. It seems as if the motherboard has burnt out, as it all looks a bit black. But don't worry everything is all backed up and copied to the cloud isn't it.
I don't know yet if the hard disks have been trashed, I am waiting on delivery of a SATA to usb connector so I can see what is on them. So till then I am reliant on a borrowed laptop and my backup. Arh but what about the cloud. In the last few years I have had four cloud accounts. This is not because I want to but because the cloud service I have signed up to has changed in some way, so I need a new cloud account, and hence I am now on account four. Even that has just notified me that it is changing so I will need to look for another come the new year. There is one major limiting factor on the cloud – The speed of ones internet connection. If it is not good then this is not an option for large scale backup, but for the small scale – files that are being worked on in the here and now. So we come back to my backup – I have a couple of external usb disks, that I use, swapping them over as father and son. I normally try and do this at the weekend and midweek. I also use the backup as an undo facility so do not use a complicated all encompassing system, (For our business I use Fbackup 5 which works well) rather I use Karens replicator, with each job coping a folder root. This is relatively quick and easy to do. Having got the files onto the hard disk all it does it update any changes. Roughly every month I do a more major copy to ensure there is not too much rubbish collecting in the backup, as being super cautious I do not use the delete function with the replicator. So having go a machine and worked out what files I am using I have taken the latest backup and copied that onto a temporary disk, which will now become my live disk (as cant copy the files onto the laptop), and future backups will now run from the temporary disk via the laptop to the backup disk. So yes it is worth spending a bit on money on a couple of external hard disks, which you can then use as a backup. You should always have two copies of the backup just in case one is damaged in some way and then the backup and all data can be lost. So now I need to decide do I want a linux or windows machine next, and if the hard disks are not trashed then do I take this opportunity and set them up as a NAS (Network Area Storage). We will have to wait and see.
0 Comments
Friends I have not recently commented about coding but a few days ago I was very frustrated with an error that I could not easily work out. At the time it was not funny but now looking back on it, I think it is quite amusing, so I will share it here. It certainly makes quite a good blog title. Being dyslexic I used to use a variety of code letters and number when giving names and tags to things. I did this to try and reduce errors for example bd-mn-im1 cannot be confused with anything else, but it does not make my code that readable.  It was suggested to me that I could improve my code by using descriptive words rather than codes. Well this maybe the case but it does not make life easier for me. I give a recent example.  I was updating a website for responsive design using the viewport meta tag <meta name="viewport" content="width=device-width, initial-scale=1, maximum-scale=1"> and things were progressing quite well, until I got to an image section of the site. Because they looked like windows the elements had been called panes (window panes). Somehow I had run a spell correction over the bit I was changing (trying to do things in a hurry in the evening), which was not good. The pane had now become a pain!! The bit of code the helpful spell correcting software helped me with is given below #pane-main{left:330px;} @media only screen and (max-width: 768px){#pain-main{left:220px; } } And of course it does not work  To compound the problem somehow the error had been replicated several times. After much frustration and using Google chrome developer tools I eventually identified the lines of css that were not working, but my dyslexia prevented me from seeing the error, only that it was not working. The tags looked correct so only by coding to a non verbose tag and proving that it worked and then retyping it back as a verbose tag did I spot the error and fix it. #pane-main{left:330px;} @media only screen and (max-width: 768px){#pane-main{left:220px; } } giving the desired result The time wasted on trying to find the error means that I have still to finish off updating the site, which I will try to do over the next few days.
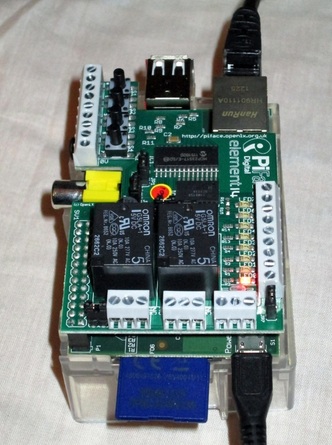 This year I got a very original Valentines day present – a PiFace for my Raspberry Pi. This is an interface board made by element 14, that sits on top of the Pi. Fortunately I had fairly recently updated the Pi operating system to the latest version of Raspbian wheezy, so knew I did not have that to do before installing the PiFace On opening the little box it came in there was the circuit board, and a leaflet that had health and safety info on it. Nothing else. Using a bit of initiative the board was fitted easily, making sure the Pi was turned off before fitting, though unfortunately it does not fit within the current plastic case, so will have to leave the top off. Then I suppose with not having any instructions I tuned the Pi on and vaguely hoped that it would see the board. Sadly this was not the case, spoilt by too many plug n play add ons. So had do some searching as to how to install the PiFace. (For ease of use I connect to my Pi via vncserver that I have preconfigured and set up. This allows me to connect to the Pi via a vnc viewer. I have ultravnc viewer http://www.uvnc.com/ on the laptop I am using for this.) I found some instructions here http://piface.openlx.org.uk/174770794 for the PiFace, but they have minor errors. Though minor they do stop things working, so with further investigation this is what I did to get it working sudo nano /etc/modprobe.d/raspi-blacklist.conf. (The install instructions miss off the leading slash (/), so if the file that appears is empty, you need to add the slash before editing it). Do a restart and then it is a good idea to make sure everything is up to date so run sudo apt-get update. Once everything is updated run wget http://pi.cs.man.ac.uk/download/install.txt Then I ran (This is slightly different form the official instructions, but that did not work for me) bash install.txt. This takes a long time to run, certainly more time than it took to go and boil the kettle and drink a cuppa. Fortunately it shows you that it is working as it writes to the screen all that it is doing and there are pages and pages of it. Once it had finished I did a restart for good measure. Then I ran the command piface/scripts/piface-emulator. 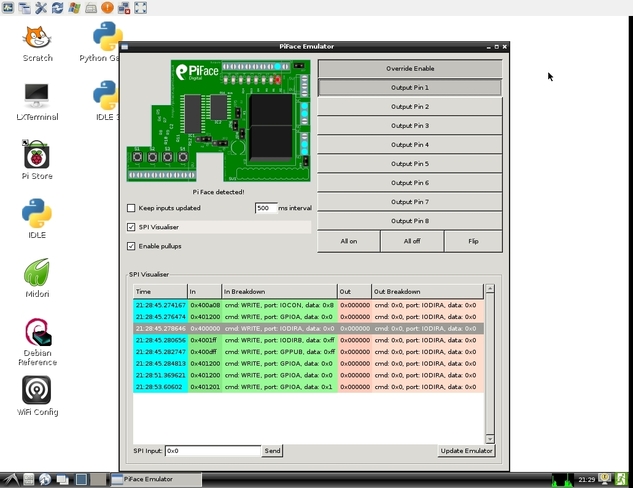 The emulator started and works fantastically well. To Control an output via the emulator Click Override Enable. Click Output Pin 1 to enable it. The PiFace interface will click as the relay turns on and the corresponding LED will illuminate. The screen updates to show the LED being on, the contacts have changed over on the relay and the first output pin is on. All the LEDs are in parallel with the outputs terminal connectors and indicate when the output is enabled. 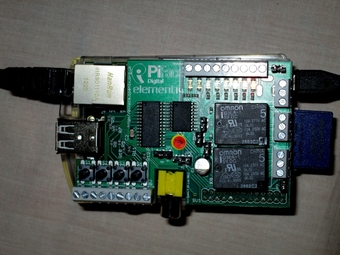 I then tried some simple Python commands – (Note I could only get this to work with Python 2 not Python 3)
To use Piface with Python import the piface.pfio module: import piface.pfio Then before use, the board must be initialised with a call to init() There are three main functions to control the interface digital_read(pin_number) - which returns 1 or 0 depending on the state of the input numbered pin_number digital_write(pin_number, state) - which sets the output numbered pin_number to state 0 or 1. State 1 turns the LED on and enables to open collector to sink current digital_write_pullup(pin_number, state) - which sets a 10k pullup on input numbered pin_number to be state 0 or 1. State 1 is pullup enabled Having got this far I was feeling quite pleased with myself, so thought I would try and get it working with Scratch – Mmmhhhmm!! Lots more searching on the web for some instructions which work, and sadly I have to say I did not find any. From opening the box to giving up with scratch it had taken around 5 hours. I did notice a comment from a dad on one site I looked at who had said he had spent most of the previous weekend trying to get the PiFace working with scratch with his son. He did say that he had eventually succeeded but it had taken more than 12 hours. It was a shame he did not say what he did. Still this is my challenge for this next weekend. Having recently had to rebuild some machines following on from the great Kielder power issue, I thought it would make sense to set out a proper list of what I like to put on a machine, rather than just using the back of an envelope and my memory. No doubt over the coming weeks I will find that i have forgotten something but this is certainly a start and I hope useful to others as well.
Machine Protection
Astronomy
Family Tree
|

Tim Fuller
Dyslexic doodles on photography, food (growing, cooking & of course eating), faith and other fascinating things. This is a personal blog expressing my views. Archives
November 2015
Categories
All
|
| Fullers Folio |
|
 RSS Feed
